How to Set Up Visitor Counter in Salepop
The Visitor Counter allows you to display the number of visitors who have viewed, added to cart, or purchased a product directly on the Product Page. By highlighting real-time shopping activity, this feature creates social proof and FOMO (Fear Of Missing Out), effectively encouraging customers to click "Add to Cart" and complete their purchases.
The Visitor Counter requires the Salepop app block on your product page. If the page shows App block is required, add the app block first: see Add Salepop App Blocks.
How to Set It Up
Step 1: Set Up the Counters
Navigate to Visitor counter from the app menu.
In the General settings tab, the Counters section includes three counters:
- Purchase counter: the number of people who have purchased the product.
- Add-to-cart counter: the number of people who added the product to their cart.
- View counter: the number of people who viewed the product.
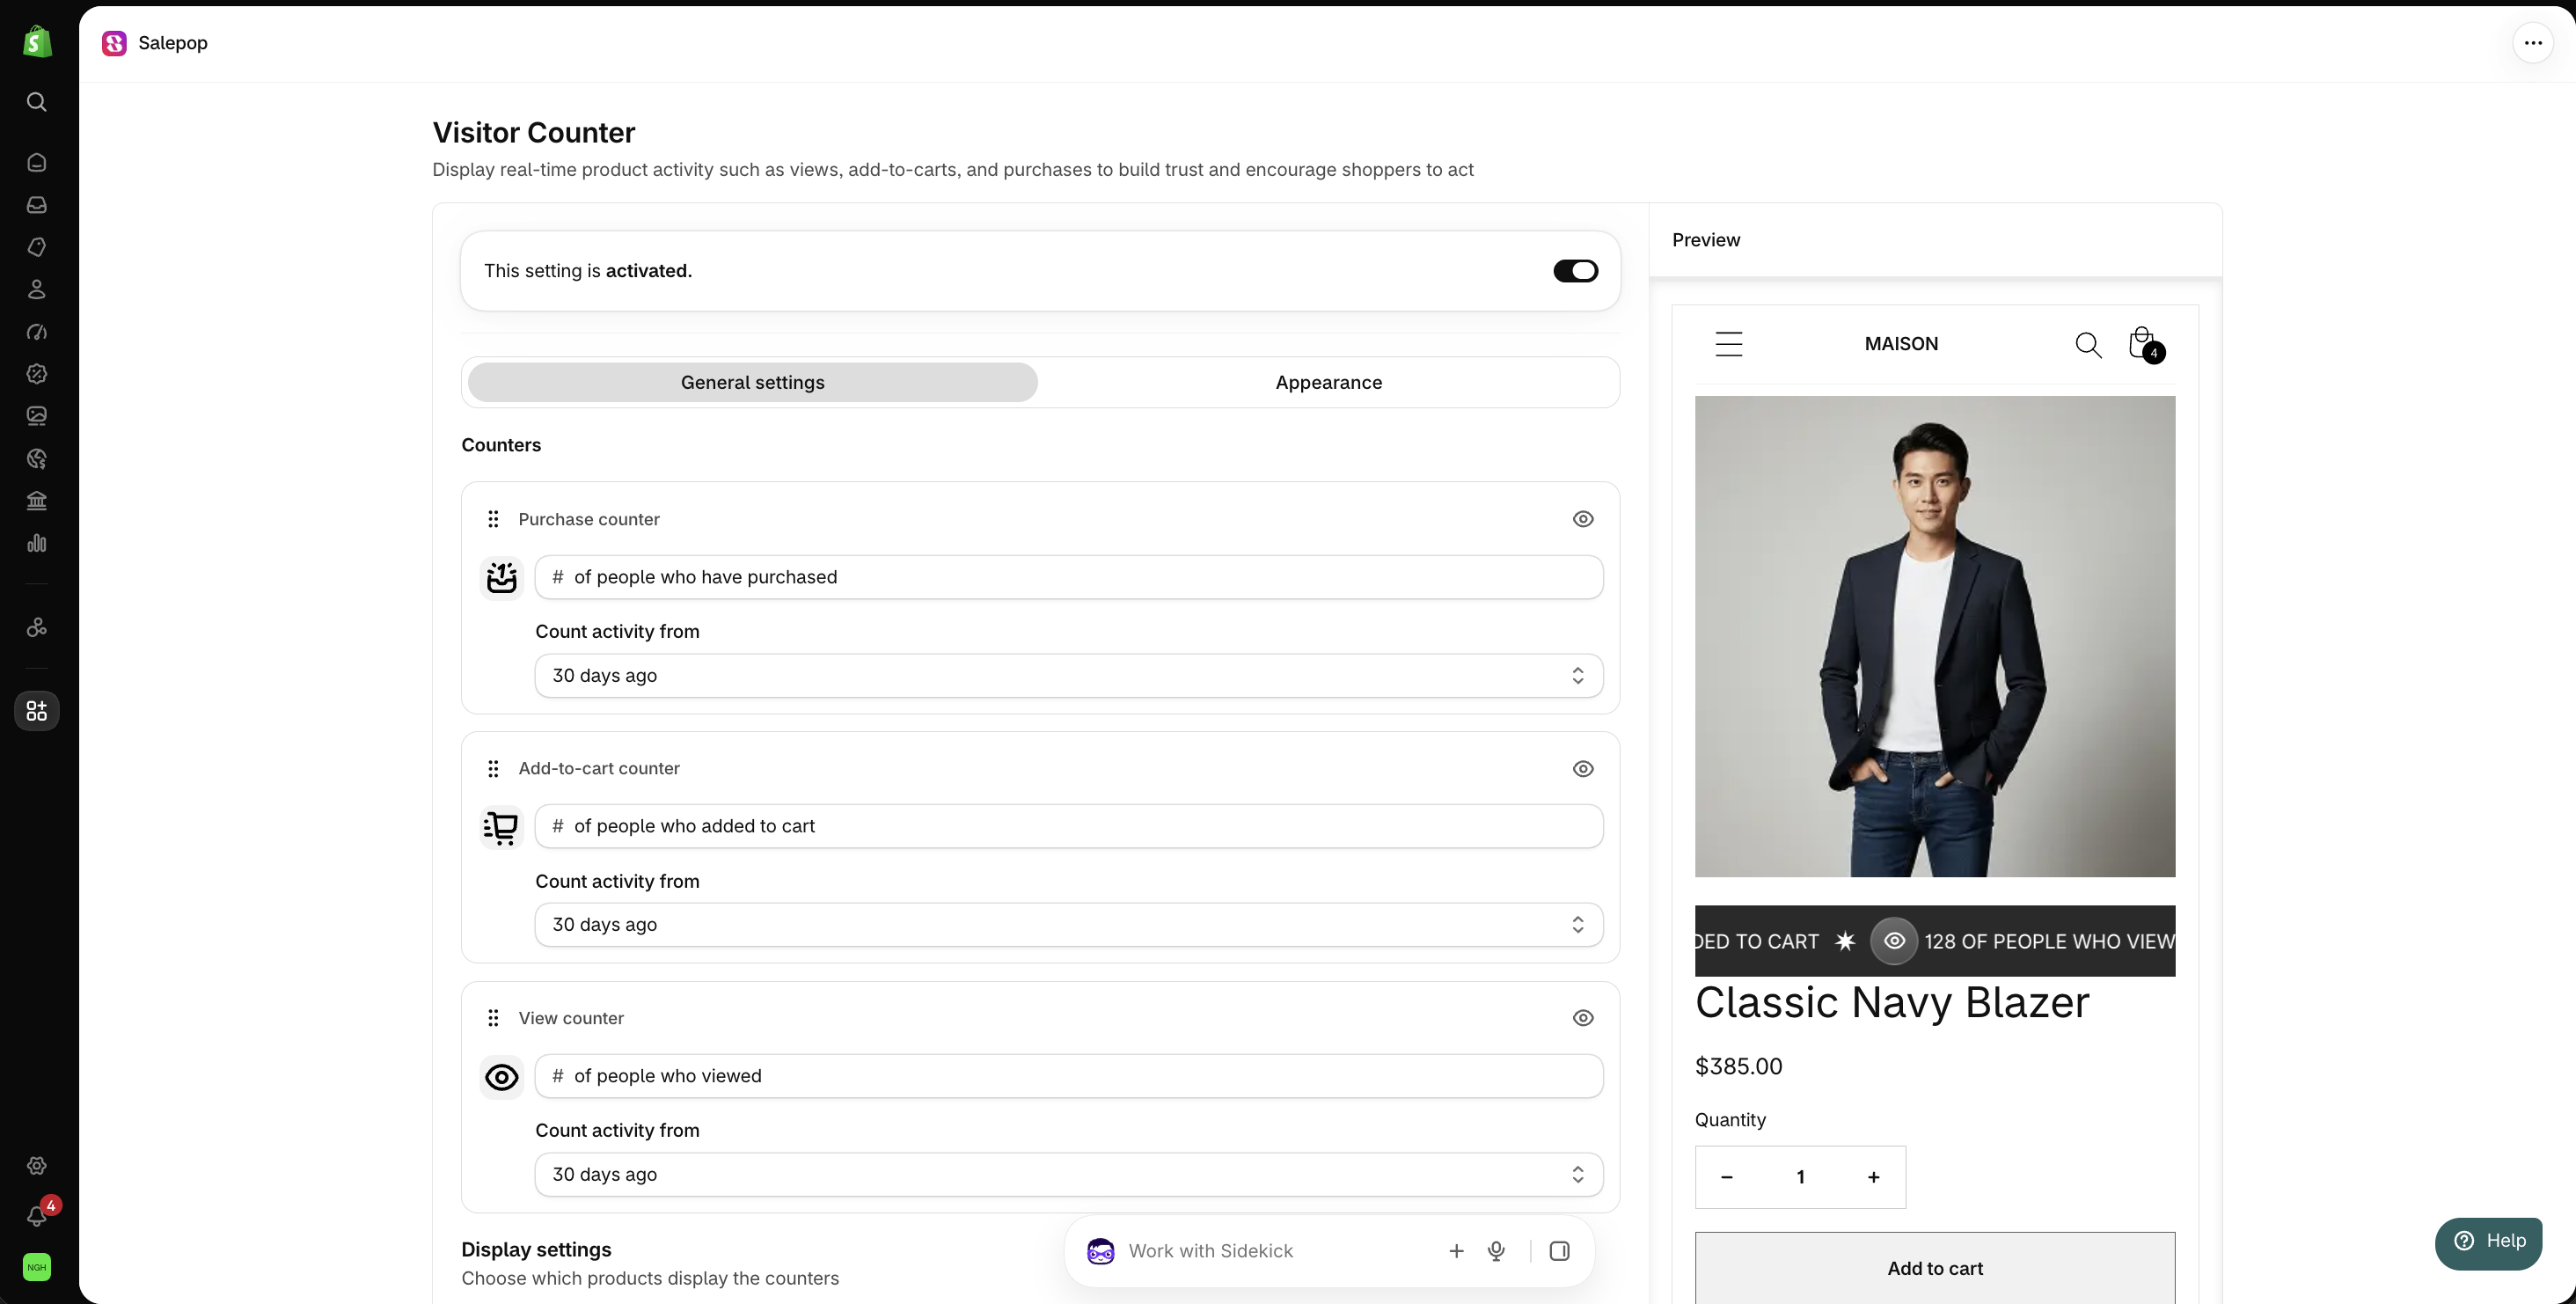
For each counter, you can:
- Edit the text: the # at the start of the field is replaced by the number on your storefront. Type the text that follows it, for example of people who have purchased.
- Choose the counting period: in Count activity from, select Today, Yesterday, 7 days ago, 30 days ago, or 60 days ago. For example, 30 days ago counts the activity of the last 30 days.
- Show or hide the counter: click the eye icon next to the counter's name.
- Change the order: drag the handle (
⋮⋮) next to the counter's name.
All visible counters are displayed together in one bar on the product page.
In the Display settings section, choose which products display the counters:
- All products: show the counters on every product page.
- Specific products: show the counters only on the products you select. Click Search product, select the products, then click Add.
Step 2: Customize the Appearance
Open the Appearance tab to customize how the counter bar looks:
- Layout: choose Single line or Wrap to multiple lines.
- Colors: set the Background and Text colors, for example #2A2A2A and #FFFFFF. The percentage next to each color is its opacity.
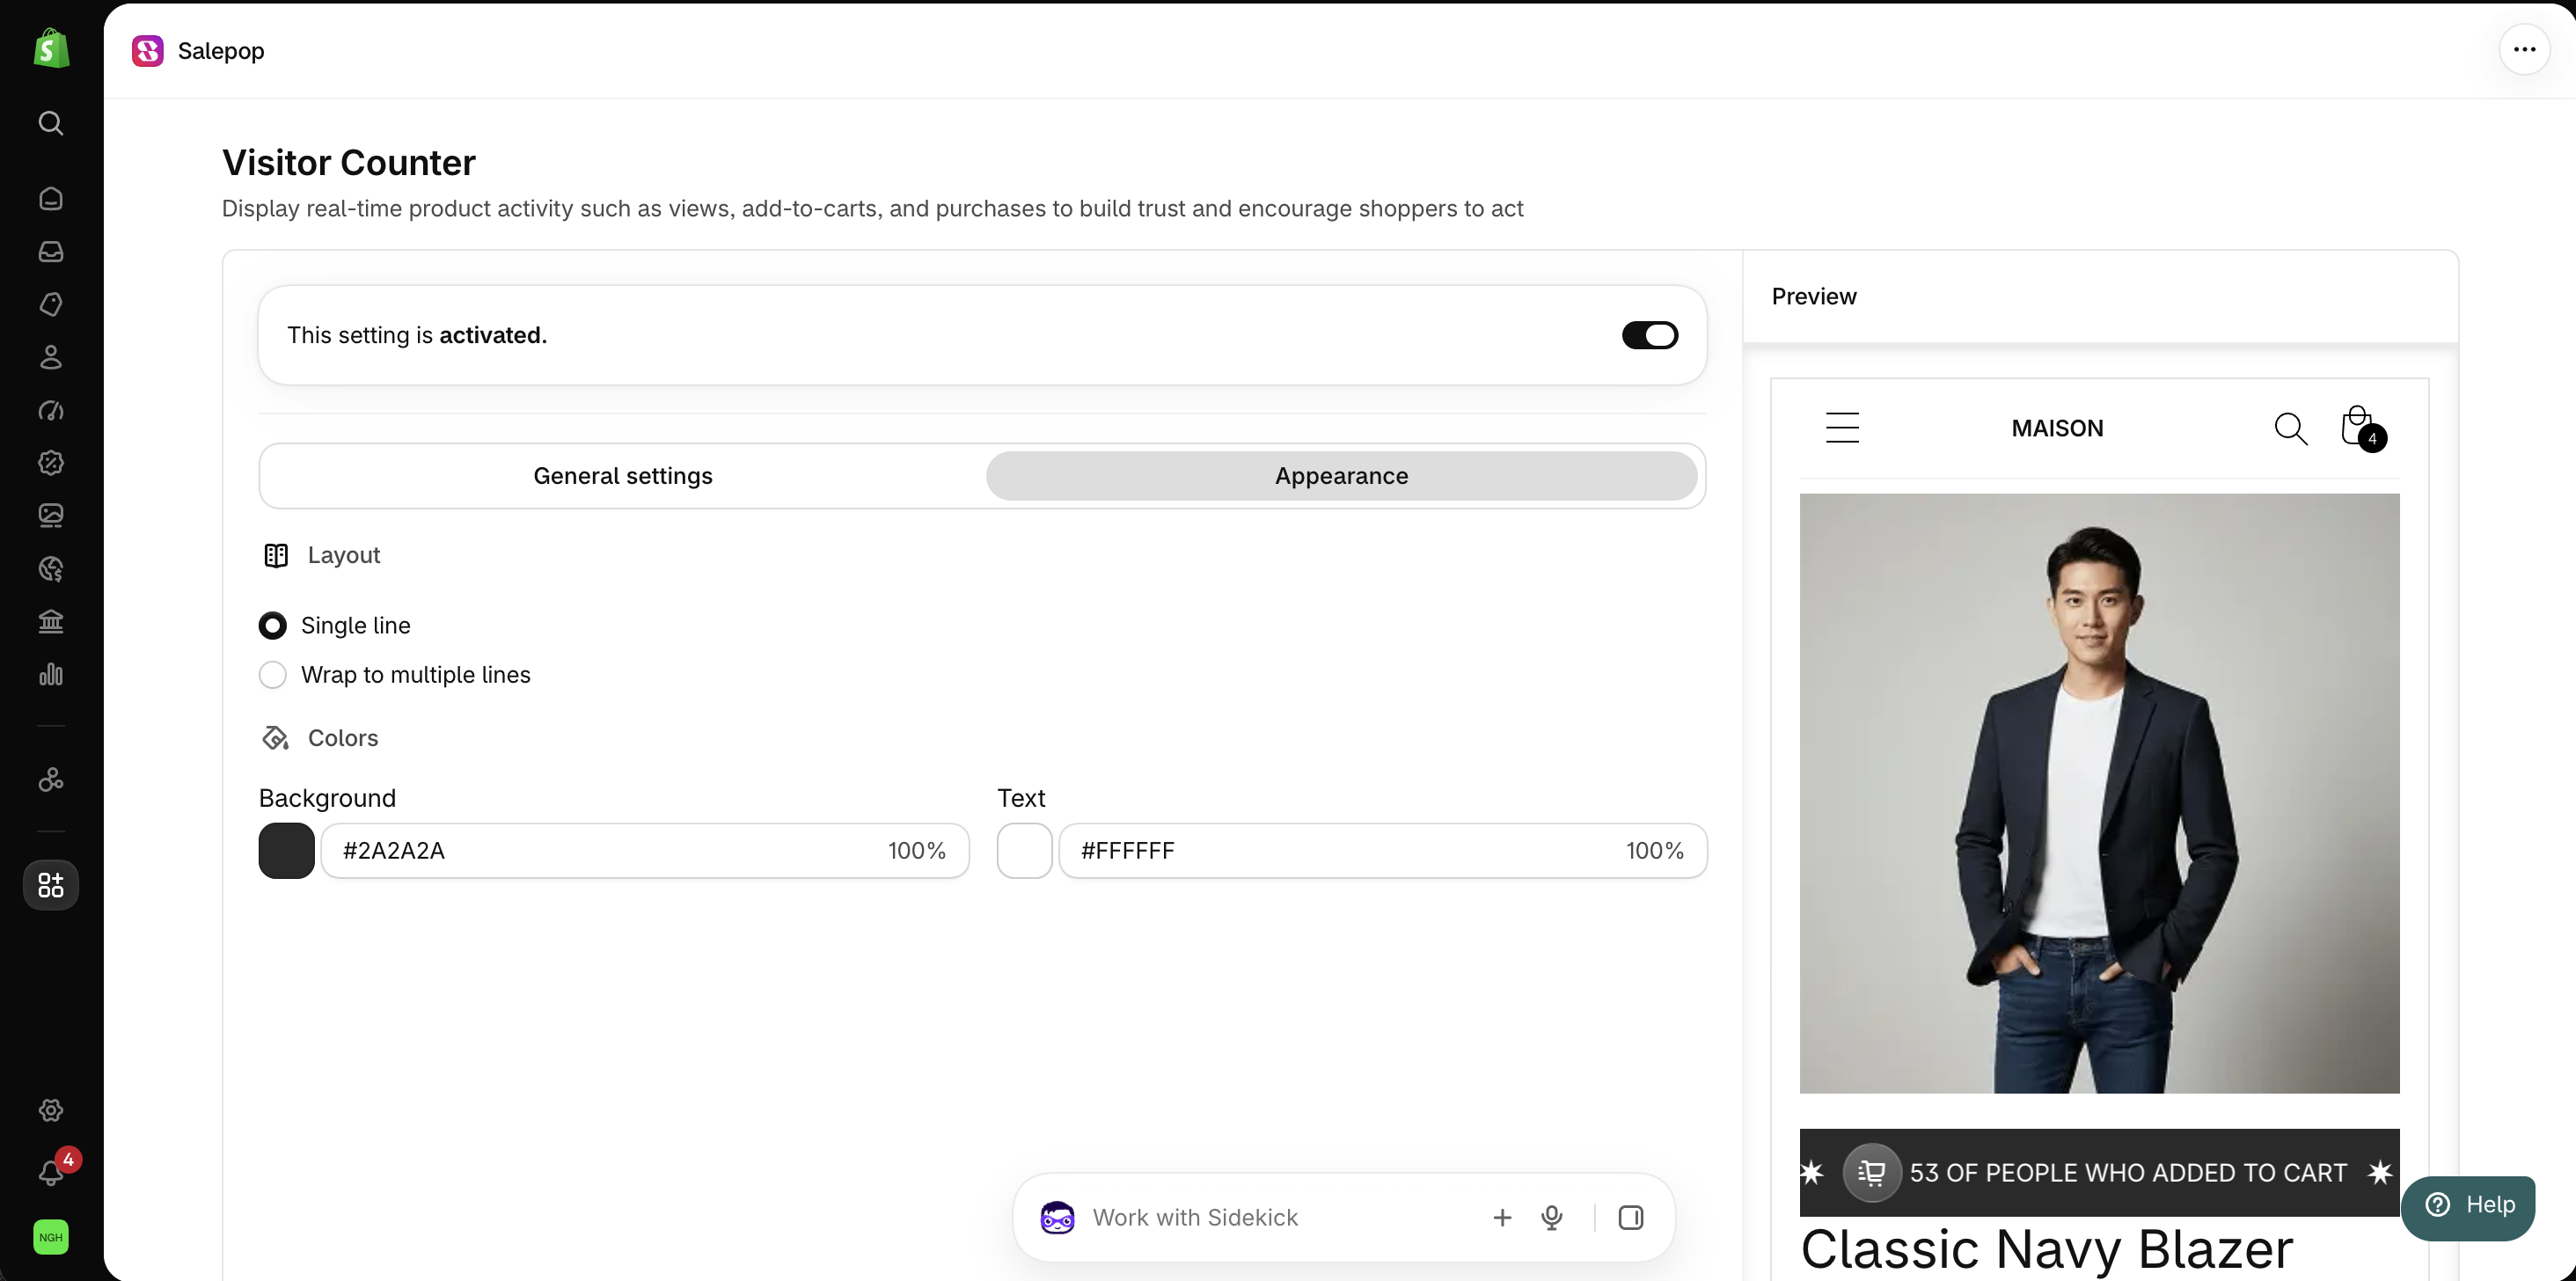
The Preview section will show you exactly how the Visitor Counter will look before it goes live.
Step 3: Activate and Save the Visitor Counter
- Turn on the status toggle on the Visitor counter page. While it is off, the Visitor Counter is in Preview only mode and does not appear on your storefront.
- Click Save.
- Visit any product page on your live storefront to confirm that the Visitor Counter is displaying correctly.
Need help?
If you have any questions or need assistance setting up your Visitor Counter, feel free to contact our support team at [email protected].